Option 1
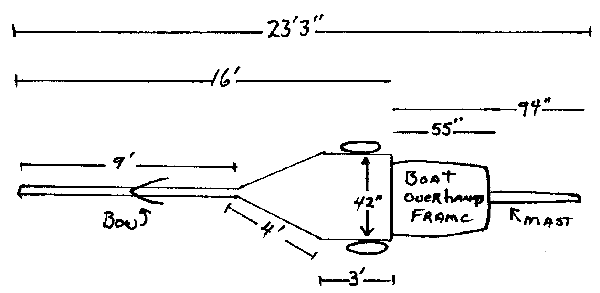
If I were going to get one today, I would seek one
with a LONG tongue (about 9 feet).
I do not know where to get one like this, so I would
have the frame custom welded to suit me.
I would buy the axle, wheels, etc. from Northern.
(They sell trailer kits/parts. (800) 533-5545 for catalog.
Good stuff, but the tongues are way too short for a 16' boat).
Why I want a long tongue. It makes moving the boat around easy.

Option 2
Any boat dealer can order a light duty trailer for you. $500+,
Highlander makes an excellent one.
It will come complete, ready for assembly.
But, do not use the boat rollers, they will dig holes in your boat.
Position the boards to support the boat on the chines!
(Not on the keel or even worse between the keel and chine.
Option 3
Nick Suhr took my suggestions and improved on them.
 Nick Suhr's Windmill Trailer
I read the two notes about trailers that appear in the WCA materials a hundred times. Then I surfed the net, looked at magazines and visited dozens of boat trailer dealerships. I learned a few critical things:
1. Nobody builds a trailer with cradles that fit a Windmill hull.
2. Almost every commercial trailer for boats that are 17 feet or smaller, is built with bunks that lie fore and aft.
3. Commercially built trailers are the same in some ways but different in others.
4. Rollers will eat up the bottom of your boat if that's all that supports the hull, especially if the rollers are run "in-line' and support the boat where there's nothing but a thin piece of plywood or fiberglass resting on them.
5. The area between the chine and the stringer for the flotation tank side is the most solid and stable part of the hull on both sides (especially at the thwart braces), and is where you want the hull to meet the parts of the trailer that support it.
6. You need to measure every trailer you look at, especially the positions of the bunks and the range of positions and angles that the design will allow - up and down AND in and out.
After finishing my studies, I found a trailer that would satisfy all of the major requirements for long distance travel, and also give me the assurance that I would not, by moving the boat to where we could go sailing, eventually destroy or damage the reward of all my labor. The aim was to find a trailer that would give me the best opportunity to adjust the bunks so they would support the boat at and between the chines and the tank side stringers along most of the length of the bunks.
The trailer I chose is Load Rite's Model #16-1000L. It's rated for a carrying capacity of 1,000 pounds, which of course is way beyond what you need for a Windmill, but it has wider and longer bunks than its baby sister (#16-700L), better springs and bigger tires. Here in New Jersey it costs $495.00. It's overall length is 16'11" and its width (between the fenders) is 48 inches.
I bolted the bottom of the winch stand 13' 5" forward from the back of the frame or, measuring the other way, 3'6" aft of the tongue. This puts the transom a little less than three feet in back of the frame, which is where she sits perfectly after I bolted the bunk supports as follows:
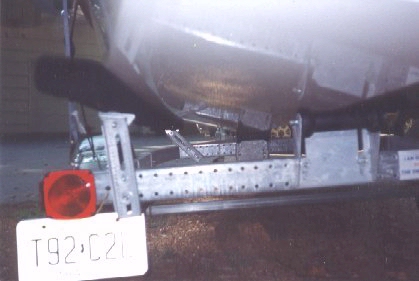
At the back of the trailer, both of the bunk support brackets are mounted as far outboard as possible with the bolts passed through the bottom slots in the supports and the top ends of the supports pushed outboard as far as the slots will allow. I installed the mounting bolts for the support brackets for the forward ends of the bunks so they angle outboard. These bolts also go through the bottom slots on the support brackets, with the top bolts passing through the outermost holes in top of the frame, and the bottom bolts through the second inboard holes at the bottom of the frame. This configuration puts the forward bunk supports at about a 45 degree angle. The ends of the bunks are bolted to the four support brackets. Loosen the bolts at the ends of each bunk, have some friends help you set the boat in position on the trailer and adjust angle of the bunks to the angle of the hull and tighten the bolts back down. Fore and aft, the bunks will take on the curve of the bottom of the hull, supporting it along its strongest parts.
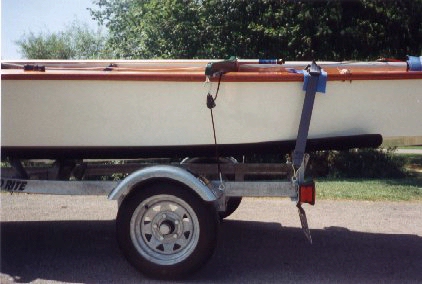
I built two hold-down frames to carry the spars and the whisker pole. They look like the ones pictured in the Builder's Guide. My idea was to position both frames above thwart braces. Thus, the aft edge of the forward frame butts up against the forward sides of the chain plates and the aft frame lies across the decks directly above the aft thwart brace. To connect hold-down straps to eyes at the end of the frames, I replaced the inboard bolts on the back of the fenders with 1/2" trailer eye bolts, and bolted standard 5/16" x 8" eye bolts through holes I drilled through the trailer frame directly below the chain plate locations. I think the 5/16ths size will be strong enough, but if not it will be no problem to drill the holes in the frames larger and move up to 3/8" diameter eye bolts.
Violating "Malpas' First Law of Trailers," I left the three rollers on mine. From the stem and along the keel to about a foot forward of the dagger board well, according to the Builder's Manual, I installed a 1/2" wide aluminum chafe strip. This is all that makes contact with the forward roller. I need this roller to keep the bow vertically aligned with the winch stand. The wider rollers in the middle and at the back of the trailer meet the keel only at the very point of the "Vee". None of the rollers bears more than minimal weight. However, I shall heed Professor Malpas' stern advice and check the hull at these contact points frequently to make sure the rollers do not inflict damage upon my pride and joy, and suggest you do the same.
Nick Suhr, #5426, 1998
PHOTOS:
(click on thumbnail for enlargement)
 side views:
