Whisker Pole Launcher
This illustrates an automated whisker pole launcher. This is not
recommended for new sailors. [DHM] This was contributed by Ethan
Bixby # 5271 of FL.
Thanks Ethan!
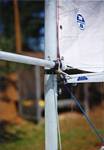
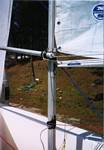
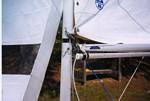
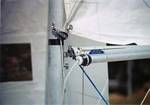 1. The pole is stored on the boom. The forward end in held in a
captive sleeve. This can be as simple as a short piece of PVC
tubing, or you can purchase special plastic fittings. The tubing
is held to the boom with a short length of shock cord, which
allows some movement. photo 1
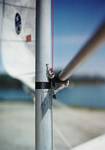
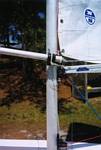
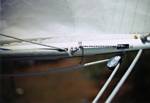 2. A shock cord retracting system supports the aft end of the
pole. photo 2. The little stainless steel fairlead is not
normally needed, and just fixing a mistake. (I started out with
too long of pole!) The exit block should be at the end of the
pole. Locate this by sorting out the forward end of the pole
sleeve and pole length, set it up on the boom, and then mark the
spot on the boom for the exit block.
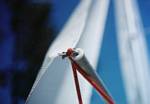
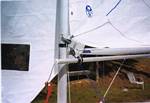
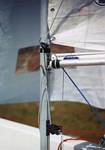 3. The pole launching line starts at the clew of the jib. It then
enters into the forward end of the pole, and then comes out the
aft end with a micro exit block. It then runs free to a swivel
block on an eyestrap mounted on the mast about 6" above the boom.
From there it runs down to a cleat, either on the mast or on the
thwart near the mast. photo 4
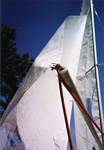
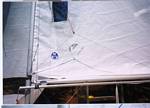
 4. To launch the pole, you simply release the jib sheet and haul
on the launcher line until it all two-blocks (the line is tight
and holds the micro exit block snugly against the swivel block on
the mast). What happens is that the jib clew is immediately
pulled to the end of the pole. Then the line causes the pole to
shoot forward until the aft end of the pole presses against the
sleeve and in turn the block on the mast. At this point the jib
leech is supporting the outboard end of the pole. photo 5.
5. To gybe, you must release the pole prior to gybing the main, and
ensure that the pole retracts enough so that the outboard end clears
the jib luff and forestay. Then re-launch after the gybe and trim and
cleat the weather jib sheet.
Some details for a superior system:
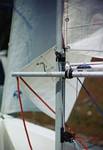 My pole is 96" of 1.25" thin-walled aluminum, with a plastic
through-deck bullseye on the forward end. You can also use a 1"
pole, which is better if you primarily sail in light to moderate
breezes. The 1" is lighter, easier to find and less expensive. A
Ronstan PNP39B fits a 1" pole (photo 6)
The pole is commonly stored on the port side of the boom,
although it really doesn't matter.
The support collar at the front end positions the forward end of
the pole about 1/2 " aft of the forward end of the boom. I place a
small eyestrap as high and as far forward as possible on the boom,
just above the center of the collar. A piece of 1/4" shock cord
runs from the collar, up through the eyestrap, then aft about a
foot to a dead-end. This can be another eyestrap, a hole in the
boom with a knot, or anything convenient. This arrangement holds
the collar up, yet gives it some room to slide forward when the
pole is launched. (See photo 1 at the top.)
The shock cord retractor system needs to be low friction so that
it works smoothly on douses but you're not fighting it when
launching. The dead-end for the shock cord is on the aft end of
the pole. It enters the boom at a check block (Ronstan RF 1985 or
Harken 088) that is placed fairly high on the boom immediately
behind the pole when the pole is fully retracted. Once inside the
boom it needs to run either 3 or 4 lengths of the boom. I
recommend 4, as the tension on the system stays more constant and
doesn't give a big increase in resistance when almost fully
launched. This should be 1/4" shock cord. You can use any
combination of blocks for this system that is easy to install in
your boom section. I used cheek blocks such as the Harken 233 or
the Ronstan RF900.
I recommend a swivel bullet block mounted on an eyestrap about 6"
above the boom, like a Ronstan RF894. For the cleat, I have been
using a Ronstan RF 5 swivel cleat mounted on the mast. We have
ours set so that it cleats pulling up, and when uncleated the
slack falls away from the cams of the cleat. Often Trudy will
stand to launch the pole. The other common hardware is to put a
block on the thwart near the mast, then run the line aft to a
cleat. Either way, always flake or coil the line after setting the
pole to ensure a smooth and quick takedown.
Going upwind, there is slack in the system, and sometimes the
length of line from the mast to the aft end of the pole sags down.
The cure for this is to tie a small diameter shock cord to your
port spreader bracket, and have either a small "O" ring, a RF1950
(19mm block) or Harken 404 at the other end, and run the launcher
line through this. When launching, it comes down to the block on
the mast, but otherwise keeps the line out of your hat! (Figure 1)
Enjoy, and keep tinkering with it. If you have any questions,
post them to me at
Ethan Bixby
or via the Windmill Class e-mail list at
Windmill List
Good luck and I'll see you at a mark rounding! --Ethan Bixby
07/16/2002
 1. The pole is stored on the boom. The forward end in held in a
captive sleeve. This can be as simple as a short piece of PVC
tubing, or you can purchase special plastic fittings. The tubing
is held to the boom with a short length of shock cord, which
allows some movement. photo 1


