Various important topics:
Other Parts:
1 |
Main Halyard Hook |
RL-343 |
N/S |
1 |
Jib Halyard Hook (Wood masts) (1) |
RL-343 |
N/S |
2 |
Halyard Shackles |
RL-326-AWL |
N/S |
1 |
Outhaul Shackle |
RL-326-AWL |
N/S |
1 |
Suction Bailer, Super Medium |
Elvstrom |
N/S |
2 |
Drain Plugs |
N/S |
|
1 |
7' Whisker Pole |
Forespar |
N/S |
1 |
Oar Lock for Pole (Optional) AL masts |
N/S |
|
1 |
30" Hiking Stick |
Forespar |
N/S |
12' |
1/4" Bow line |
Samson |
N/S |
1 |
Forward Chain Plate |
RL-352 |
N/S |
3 |
Stay Adjusters |
RL-349-P |
N/S |
2 |
Side Stay Chain Plates FG hulls(2) |
RL-352 |
N/S |
2 |
Side Stay Tangs Wood hulls (3) |
RL-398 |
N/S |
2 |
Tang Covers Wood hulls (3) |
RL-344-B |
N/S |
1 |
Rudder Pintal |
RL-360-L |
N/S |
1 |
Rudder Pintal |
RL-360-S |
N/S |
2 |
Rudder Gudgeons, |
RL-360 |
N/S |
1 |
RL337 |
N/S |
|
2 |
6" Inspection Ports |
N/S |
|
2 |
7 1/2" Inspection Ports with storage bags |
N/S |
|
1 |
Telescoping Paddle |
Team |
N/S |
(1) Not intended for use with Jib Halyard Puller System. This is a simple way of securing both the jib and main halyards. The nicropress fits into the hook plate and holds the sail up.
(2) Fiberglass hulls only. Use chain plates for all stays. Through bolt and back with AL plate!
(3) Wood hulls only. Tangs are bolted to thwart brace and extend thru deck. Stay adjusters clip to tang.
Goosenecks:
for AL mast RL-252 R/L
Specify RL-252, with RL-327 arm, not with pin, as normally supplied with RL-252. RL-252 slides in the sail rope groove. RL-327 has tangs, rather than a pin to attach to the boom. Race Lite will sell this special combination on request. Please note this combination is specifically for AL spars to the old Kenyon A section specifications. his is the spar of preference for most owners. The spars are available only from a WCA member Jim Lingeman.
for Wood mast RL-329-SP R/L
Attach to 5/8" sail track, as used in jib sheet system.
Bobbing DB's - Windmill daggerboards will float up in the well. All types of solutions have been tried, perhaps the best solution, is to glue outdoor carpet to the sides of the well. I have strips of carpet about 2 inches wide on both sides of the well, at both the top and bottom of the well. So visit your local carpet dealer and get a few scraps of rubber backed outdoor carpet, the thin variety. Test to see that the carpet will allow the board to be inserted into the well. When all seems OK, coat the well and the rubber backing with contact cement. Then, put a sheet of wax paper over the cement on the carpet, place the carpet in position and remove the wax paper. The carpet will protect the finish of your board and provide some degree of control on keeping it in place.
I would also put sheet rubber on all four corners of the well the protect the edges of the board from dings. But first a quote of two articles from the By-Laws.
XI.3.R. Bumpers (blocks of hard rubber or similar material) are allowed at each end of the daggerboard well for the purpose of protecting the edges of the daggerboard. When installed each bumper shall not encroach on the normal slot dimensions by more than 3/4 inch. The bumpers shall not be permitted to wear a groove in themselves more than 1/2 inch deep as they then become an illegal gasket.
XI.3.S. Lining the inside of the daggerboard well with synthetic material (such as outdoor carpet) is permitted for the purpose of protecting the daggerboard finish. Such lining must not extend lower than 1 inch above the bottom of the daggerboard trunk slot. Maximum thickness of the liner is 3/8" uncompressed.
This means the edges of the DB may be protected, but the bumpers shall not close the slot more than the minimum tolerance.
Flotation. Without flotation a 'Mill is a beast to sail away after a capsize. (a la Thistle, etc.) There is only one real solution to the problem – air tanks. Some have tried foam. It’s fairly cheap, easy to install; but looks terrible and is of marginal help. The problem is that you cannot get the foam low enough in the boat to provide the necessary buoyancy. When righted, you will still have a boat full of water and perhaps the DB well will be a fountain, when you and the crew get back aboard. Air bags are better than foam, but no where as good as air tanks.
Air Tanks. The only real solution is full length side tanks. They are more difficult to put in after the boat is built, but they will enable you to sail away quickly after a capsize. They will reduce frustration and provide the margin of safety needed in case you are caught in a sudden squall or capsize when the water temperature is cool. Part II of the How-To manual describes how to install them during construction. Jim Vensel's sketches, in separate non-digital article available from the Class. show how to do it after the fact. They are a chore to fit to a hull, but they work. Not only do they provide buoyancy, but they seal the under the area off, leaving less room for water.
Some people opt to put them only on one side to save work. If they dump it on the side without tanks, they flip it over, then right it again.
The center tank provides the most lift, then the forward and finally the aft tank, in case you decide to install them in stages. But it really takes all three, before you will realize the full advantage.
A ancillary advantage is realized by installing inspection ports with cat bags in the tank sides, providing water tight storage space for registration papers, lunch, tools, etc. The tank sides also provide a place to install hardware, just like the plastic boats have.
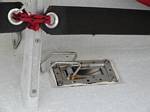
Suction Bailer - By all means install a suction bailer, (Elvstrom Super Medium is a good brand and size), install it along side the aft end of the DB trunk. This is where the water will stand in the boat while underway, with the crew in their normal positions, hence where it will do the most good.
I know it will be mentally difficult to cut a hole in your boat, but it necessary. Water will splash into your Windmill when the breeze is kicking up. Plus you will want to leave it open when the boat is on the trailer, so any water that enters can drain out.
Most marine dealers sell suction bailers. The one you want is a Elvstrom-type bailer, the Super Medium size. [They are now called Andersen Bailers in the US] (This fits hulls from 1/8 to 9/32. The opening size is 2.5 square inches. The fitting hole is 1 5/8 x 4 5/16. They are about $80. I did a web search for ‘Andersen Bailers’ and turned up these sources: www.apsltd.com and www.marinestorechandlers.com
The installation of the suction bailer is easy before you turn the boat over. One builder suggests putting the bailer in right after the daggerboard well is installed.
The bailer should be about two inches
forward of the aft end of the DB well and be outboard just enough so that when
it is opened neither the bailer, nor your fingers contact the DB well. 1.25
inches out from the well kickboard should be right.
Here's one installed. 
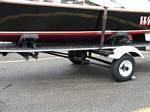
Trailer supports should be spaced at 1/3, 1/2 and 2/3
points, with all of the weight on the chines. Do not use rubber rollers as
supports, they will wear holes in your boat. I use vee shaped cradles for each
support. The Class has a non-digital article on trailer bed construction available.
Or just build your own trailer bed! No more road trash on your bottom. 
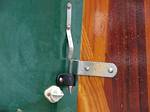
Transom Flaps - They will dump a lot of water fast, but if you have built in flotation tanks you will have very little to dump! Advise from here is don't mess up the hull installing transom flaps, unless you prove to yourself that they are needed. I have not seen anyone put them on a 'Mill in years. OK, you want them. Two holes about 4 1/2 x 1 1/2 with Plexiglass covers attached to the outside of the transom with teeny-weeny hinges. Lead a 1/16" line, with some shock cord spliced into it, through a hole in the Plexiglass to a clam cleat on the keel, aft of the thwart. (See photo and diagram on two following pages.)
It went up the mast! If you have internal halyards, tie a large knot on the halyard tails to prevent their escape up the mast. I suggest that you check the tails for wear periodically, where the line joins the wire, it painless to repair while the halyard and tail are in one piece, quite another matter after they have parted.
There are two ways to feed a halyard through the mast section. Either tape the halyard end to end to a stiff wire (3/8") and push it through the mast or stand the mast up and from a high porch or window and drop a string weighted with lead sinkers down through the section. You can then tape the halyard to the string and pull it back through.
The mast went boom! I have heard the distressing sound of a mast falling three times. In all cases, it was the failure of a 20 cent nicropress sleeve causing the destruction of a $300+ spar.. Never compress a nicropress sleeve in the same place twice. The mast will bend on the thwart opening if a fitting fails, so I suggest that you install two fittings on each end. You should check all fittings a few times a year looking for cracks in the sleeve. Having the fitting swaged to the wire is the best solution, but not everyone has access to a marine shop with the machine to do it.
